Published On Feb 7, 2024
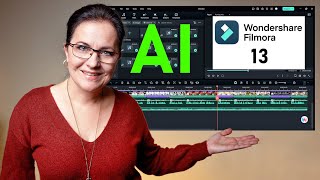
Filmora 13 is an all in one video editing app and it’s one of the most beginner friendly video editing apps out there. And they have recently added ton of useful AI tools to speed up and simplify your editing process.
I’ve been editing for 15 years and I think this is one of the most friendly editing apps out there. And I’ll show you how to get started, step by step using Filmora to edit your videos.
You can download the latest version of Filmora from their website with our affilate link:
https://click.linksynergy.com/fs-bin/...
Step 1: Import Media
What to Do: Start by importing your media. This could be your own video clips or stock footage that helps tell your story.
How to Do It: Simply select your files and import them into your editing software.
Step 2: Basic Editing
Drag to Timeline: Grab your video and drag it to the timeline to get started.
Cutting Clips: Use the cut tool to remove parts you don't need. For middle cuts, apply the cut tool twice and delete the unwanted section.
Rearranging Clips: Feel free to drag clips around the timeline to change their order.
Step 3: Tracks and B-Roll
Adding Video Tracks: If you need to layer videos, add more video tracks to your timeline.
Adding Audio Tracks: Create separate tracks for dialogue and music to keep things organized.
Step 4: Working with Audio. Music and voice over
Adding Audio: Find the audio panel, then drag your choice of audio, voiceover, or music to your project.
Here is my affilate link to a recommended USB Mic:
https://amzn.to/4blSKay
Step 5: Add Titles
Engage with Text: Titles can help maintain viewer interest. Add them where necessary.
Step 6: Add Transitions
Smooth Transitions: Check the transitions menu to add smooth cuts between clips.
Step 7: Effects and Stickers: Apply filters and animated elements to elevate your video's look.
Step 8: Color Correction:
You can change the brightness, contrast and overall looks and color of any video clip in the color panel.
Step 9: Save Your Project
Don't Lose Progress: Regularly save your project to avoid losing your edits.
Step 10: Export Your Video
Once you're happy with your edit, export your video and upload it to your chosen platform.