Published On Oct 25, 2020
Amazon Tool Deals of the Day: https://amzn.to/3eUGcsD
Drywall is the building material used to create the walls of your home.
It comes in various thicknesses, from ¼” to 5/8”.
But probably the standard thickness is ½” which we used in our project of putting drywall over a framed out storage area in our garage.
First, measure the length of the wall.
In our case, our first wall was 48” long.
When hanging drywall you want to hang it horizontally so that you have the least number of seams that you have to tape and bed in the wall.
Also, you want to avoid lining up seams of each drywall piece as you go hang each row.
Finally, always hang drywall from the ceiling down. This way if you have to put in a narrow piece at the bottom of a wall, it won’t stand out as much as if it were eye level or above. This way the wall will look better and will be straighter.
Take your measurement, and mark 48” on the drywall.
Also, the studs of our wall are 16” on center so we need to mark the drywall for that as well, that way we’ll know exactly where to put a nail or screw so that it will hold it to the stud.
After you’ve marked the drywall for length and studs, take a T-square, or a four foot level, something that is long enough to give you a straight edge across the four foot width of the drywall, and use a pencil to mark that line across the sheet of drywall.
When you’re finished, take a utility knife and score the drywall along the length line you’ve marked, in our case, at 48 inches. (Since we’re hanging a piece of drywall on a wall that is less than the 8 feet long standard piece of drywall we are going to have to break the drywall to the correct length.)
Once you have the length line scored, go around to the back of the drywall and put your knee on the line where the drywall is scored, and then crisply pull the drywall towards you. This will break the drywall in half.
Again take the utility knife and cut the paper backing on the drywall.
After this is done, you may notice that the edges of the drywall are a little rough. That’s Ok, take a drywall shaver tool and rub it along the edges to smooth them out for a nice clean edge.
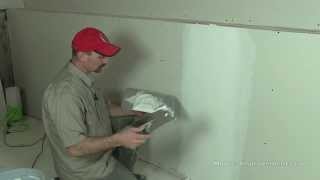
Once you’ve got your edges smoothed out, you’re ready to hang the drywall.
Use a hammer and drywall nails to attach the drywall to the studs.
For the top piece, make sure it is flush with the ceiling and you’re ready to nail.
When you hammer in the nail, you want to hammer the nail so that it’s just recessed a little bit in the paper. In other words, you want to hammer in the nail just enough to create a little dimple.
If you hammer the nail too deep, you’ll break the core of the drywall and it will lose its strength.
If you don’t feel confident with a hammer, you can buy or rent a Duraspin drywall screw gun. The great thing about this tool is that it has a depth gauge so you can set the depth of your screw so that it will create a perfect dimple every time and not damage the drywall.
Taping and Bedding the Drywall
Taping and bedding is the method for smoothing out the nail marks and seams to give you a seamless, smooth looking wall.
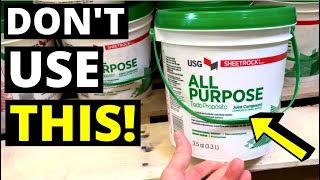
First of all, you need to buy some joint compound (available at any hardware or home center) and a 4”, 8” and 10” blade.
Take the 4” blade, and use it to apply joint compound over the dimples left by the nails or screws in the drywall.
Be sure and scrape away any excess.
Next, take the 4” blade and float in or spread about a ¼” of joint compound over the seams. Make sure you have a nice even layering.
Next, take some drywall tape, and spread it evenly over the joint compound that’s covering the drywall seams. The joint compound will hold the tape in place.
Tear the tape off when you reach the end of the seam.
Now, take the drywall 4” blade and while holding the tape down with hand, smooth out both the tape and the joint compound to make sure you don’t have any bubbles in the seams.
After this first coat is dry, lightly sand it. You don’t want to sand too hard because you don’t want to tear the paper.
Now you’re ready to apply a second coat of joint compound over the tape using an eight inch blade.
Let that dry overnight and then sand it again.
Then apply your third and final coat using a ten inch blade.
As you can see you’re using larger blades each day.
The reason for that is that you want to feather or spread out the joint compound and extend it so that it blends in with the rest of the wall.
After the third coat is dry, sand it once again to get rid of any imperfections.
Due to requests, I am now including links to products when possible. These links are provided for reference, no company or individual paid to be in this video. Depending on the vendor, a small commission might be paid and would be used to support adding content to this channel.
Amazon Prime free 30 day trial: https://amzn.to/3g9mwCL
Amazon Homepage: https://amzn.to/3gQSS5z