Published On Feb 4, 2022
Artstation Link for high res - https://www.artstation.com/artwork/2q...
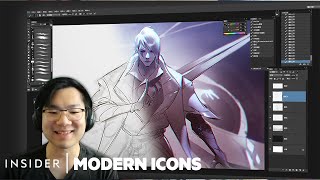
During the sketch stage. I was trying to explore more dynamic poses but unfortunately, most of the dynamic poses of archers have already been done on other splashes. I think what they chose here was a great call since the story is about Kindred guarding the temple of relics.
Check out my other thumbnails here: • Porcelain - Official Skins Theme | Lu... I cannot post them unfortunately.
When preparing for render, I overkilled the background with 3D. Unfortunately, most of it was gonna be covered up in the end. I also overkilled using masks, but for Lamb, I think it was worth it. The porcelain designs where hard to paint cleanly without doing this method.
Mid production I got a posed 3D as reference and I had to readjust everything again especially wolf which I had to redraw. It was tricky getting the curves and finding the balance of the wolf's head. Although it was not too hard to adjust Lamb since I already separated her layers. It was just like posing a paper doll. The process didn't go as smooth as I wanted to but I like the end result.
______________________________________________________
𝗣𝗮𝗶𝗻𝘁𝗶𝗻𝗴 𝗯𝘆: David Villegas (Deiv Calviz)
𝗜𝗻 𝗖𝗼𝗹𝗹𝗮𝗯𝗼𝗿𝗮𝘁𝗶𝗼𝗻 𝘄𝗶𝘁𝗵 𝗥𝗶𝗼𝘁 𝗚𝗮𝗺𝗲𝘀
𝗖𝗹𝗶𝗲𝗻𝘁: Riot Games
𝗥𝗶𝗼𝘁 𝗚𝗮𝗺𝗲𝘀 𝗔𝗗: Jessica Oyhenart
𝗪𝗲𝘀𝘁 𝗦𝘁𝘂𝗱𝗶𝗼 𝗔𝗗: Mingchen Shen
𝗙𝗶𝗻𝗮𝗹 𝗣𝗼𝗹𝗶𝘀𝗵: League Splash Team
______________________________________________________
𝗙𝗢𝗟𝗟𝗢𝗪 𝗠𝗘 𝗛𝗘𝗥𝗘:
• INSTAGRAM: / deivcalviz
• TWITTER: / deivcalviz
• FB: / deivcalviz
• PORTFOLIO: http://www.deivcalviz.com
______________________________________________________
𝗠𝗬 𝗧𝗨𝗧𝗢𝗥𝗜𝗔𝗟𝗦 𝗔𝗡𝗗 𝗕𝗥𝗨𝗦𝗛𝗘𝗦 𝗔𝗩𝗔𝗜𝗟𝗔𝗕𝗟𝗘 𝗛𝗘𝗥𝗘!!
• https://www.artstation.com/a/1142983
𝗔𝗙𝗙𝗜𝗟𝗜𝗔𝗧𝗘 𝗧𝗨𝗧𝗢𝗥𝗜𝗔𝗟𝗦:
Level Up Your Digital Painting Skills 2.0: New Upgrade
https://www.wingfox.com/c/8695_33516_... (15% off coupon code : WFR15 )
Ancient Fantasy Character Design: Dark Angel
• https://www.wingfox.com/c/8584_33516_... (15% off coupon code : WFR15 )
Level Up Your Digital Painting Skills: Beginner to Advanced by 黄裕仁Fishman
• https://www.wingfox.com/c/8294_33516_... (15% off coupon code : WFR15 )
______________________________________________________
𝗦𝗣𝗟𝗔𝗦𝗛 𝗙𝗔𝗤
► A splash takes 4-5 weeks. 1st week for multiple sketches. 2nd week to figure out the colors. 3rd to 5th week to render and polish.
► I paint with the canvas size 8,000 x 4,500 px but it is shrunk down to 7,000 x 3938 for final. Final file is around 800mb.
► This video is 40x speed up. Do the math based on this video's time. Usually, the real time is around 40-80+ hours. (if the other thumbnails were added in). Actual work hours are more than 100+ hrs when you factor in the other thumbnails, research, and contemplating time.
► The toolbar at the left side is called Lazy Nezumi. It helps me get smoother lines and have perspective guides.
► To quickly color a grayscale, I use two methods.
GRAYSCALE COLORING 1ST METHOD:
• Layer on top: The grayscale set to multiply. Brighten it up and colorize depending on the mood you want. This Acts as an AO pass.
• Layer below: Use a solid brush to paint in the flat local colors.
GRAYSCALE COLORING 2ND METHOD: (Messier)
• Layer on top: Set this layer to softlight and add in your colors. This makes it a bit look dull on the highlights so you need to manually fix the highlight colors.
• Layer below: Grayscale here.
► Tip for revisions. You can use liquify on multiple layers. Right after you do it on one layer. You can press Alt+Ctrl+F to apply it again to a different layer. Make sure not to deselect your selection if you are doing this.
► I use color dodge and sometimes linear dodge blending mode to add in lighting layers.
► I group layers using this logic:
1. Post processing
2. VFX, magic
3. Character
4. Some fog
5. Background people, elements, etc
6. Sky and far background
► Here are my tools:
2008-2020:
• Wacom Intuos 3 6″x8″
• Samsung T190
• Intel Core i7 3.50GHz, 16GB RAM, Windows 7
• Photoshop CS6, DAZ 3D, Alchemy
2021:
• XP Pen Artist 24 PRO
• Dell UltraSharp
• AMD Ryzen 7 3700X 8-Core, 32 GB RAM, Windows 10
• Force Series Gen.4 PCIe MP600 500GB NVMe M.2 SSD (this is important for faster everything)
• Photoshop CC, Daz 3D, Zbrush, Maya
► To open a second window of your artwork in Photoshop it is located in Window - Arrange - New Window.
► To temporarily convert your artwork into grayscale. Go to View - Proof Setup - Custom - Select Dot Gain 20%. Then Press Ctrl + Y to toggle this view.
► I am not going to upload longer or shorter versions of this because that takes too much of my personal time. I'm already giving this away for FREE.